
Page 20 - PP8inst
P. 20
Analyzing Images 16
Analyzing an Image
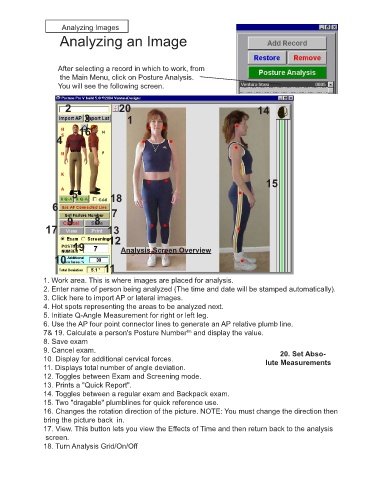
After selecting a record in which to work, from
the Main Menu, click on Posture Analysis.
You will see the following screen.
2 20 14
3 1 1
16
4
15
5 18
6 7
9 8
17 13
19 12 Analysis Screen Overview
10
11
1. Work area. This is where images are placed for analysis.
2. Enter name of person being analyzed (The time and date will be stamped automatically).
3. Click here to import AP or lateral images.
4. Hot spots representing the areas to be analyzed next.
5. Initiate Q-Angle Measurement for right or left leg.
6. Use the AP four point connector lines to generate an AP relative plumb line.
7& 19. Calculate a person's Posture Number and display the value.
tm
8. Save exam
9. Cancel exam. 20. Set Abso-
10. Display for additional cervical forces. lute Measurements
11. Displays total number of angle deviation.
12. Toggles between Exam and Screening mode.
13. Prints a "Quick Report".
14. Toggles between a regular exam and Backpack exam.
15. Two "dragable" plumblines for quick reference use.
16. Changes the rotation direction of the picture. NOTE: You must change the direction then
bring the picture back in.
17. View. This button lets you view the Effects of Time and then return back to the analysis
screen.
18. Turn Analysis Grid/On/Off