
Page 52 - PP8inst
P. 52
Measuring the Q-Angle 48
To measure a Q-Angle
you will first palpate and
place markers over the
1. ASIS
2. Center of Kneecap
3. Over the Tibial
Tuberosity
Next, import, as usual,
the AP picture to analyze.
You may analyze the entire
posture as usual, then add
the Q-Angle, or you can per-
form the Q-Angle test only.
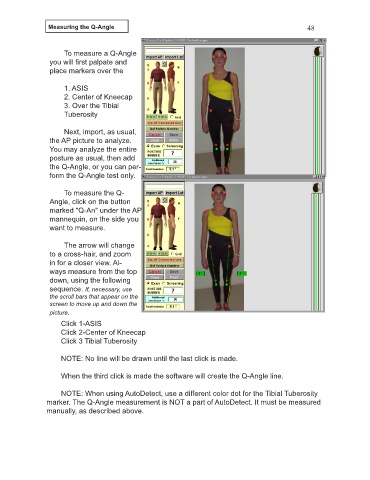
To measure the Q-
Angle, click on the button
marked "Q-An" under the AP
mannequin, on the side you
want to measure.
The arrow will change
to a cross-hair, and zoom
in for a closer view. Al-
ways measure from the top
down, using the following
sequence. If, necessary, use
the scroll bars that appear on the
screen to move up and down the
picture.
Click 1-ASIS
Click 2-Center of Kneecap
Click 3 Tibial Tuberosity
NOTE: No line will be drawn until the last click is made.
When the third click is made the software will create the Q-Angle line.
NOTE: When using AutoDetect, use a different color dot for the Tibial Tuberosity
marker. The Q-Angle measurement is NOT a part of AutoDetect. It must be measured
manually, as described above.